Web Forms
- 13 Aug 2021
- 1 Minute to read
- Print
- DarkLight
- PDF
Web Forms
- Updated on 13 Aug 2021
- 1 Minute to read
- Print
- DarkLight
- PDF
Article summary
Did you find this summary helpful?
Thank you for your feedback!
There are two methods in collecting data from a Participant (or Launcher in some cases) prior to signing documents to choose from. You can use the "Is Form Filler" method found in the Task Editor (this method is referred to as "DocForms" and is explained in the Task Editor documentation section) or you can use the custom HTML form building tool called "Web Forms". These are forms that will display in an HTML page with additional field types and field validation that you don’t get with the DocForms method.
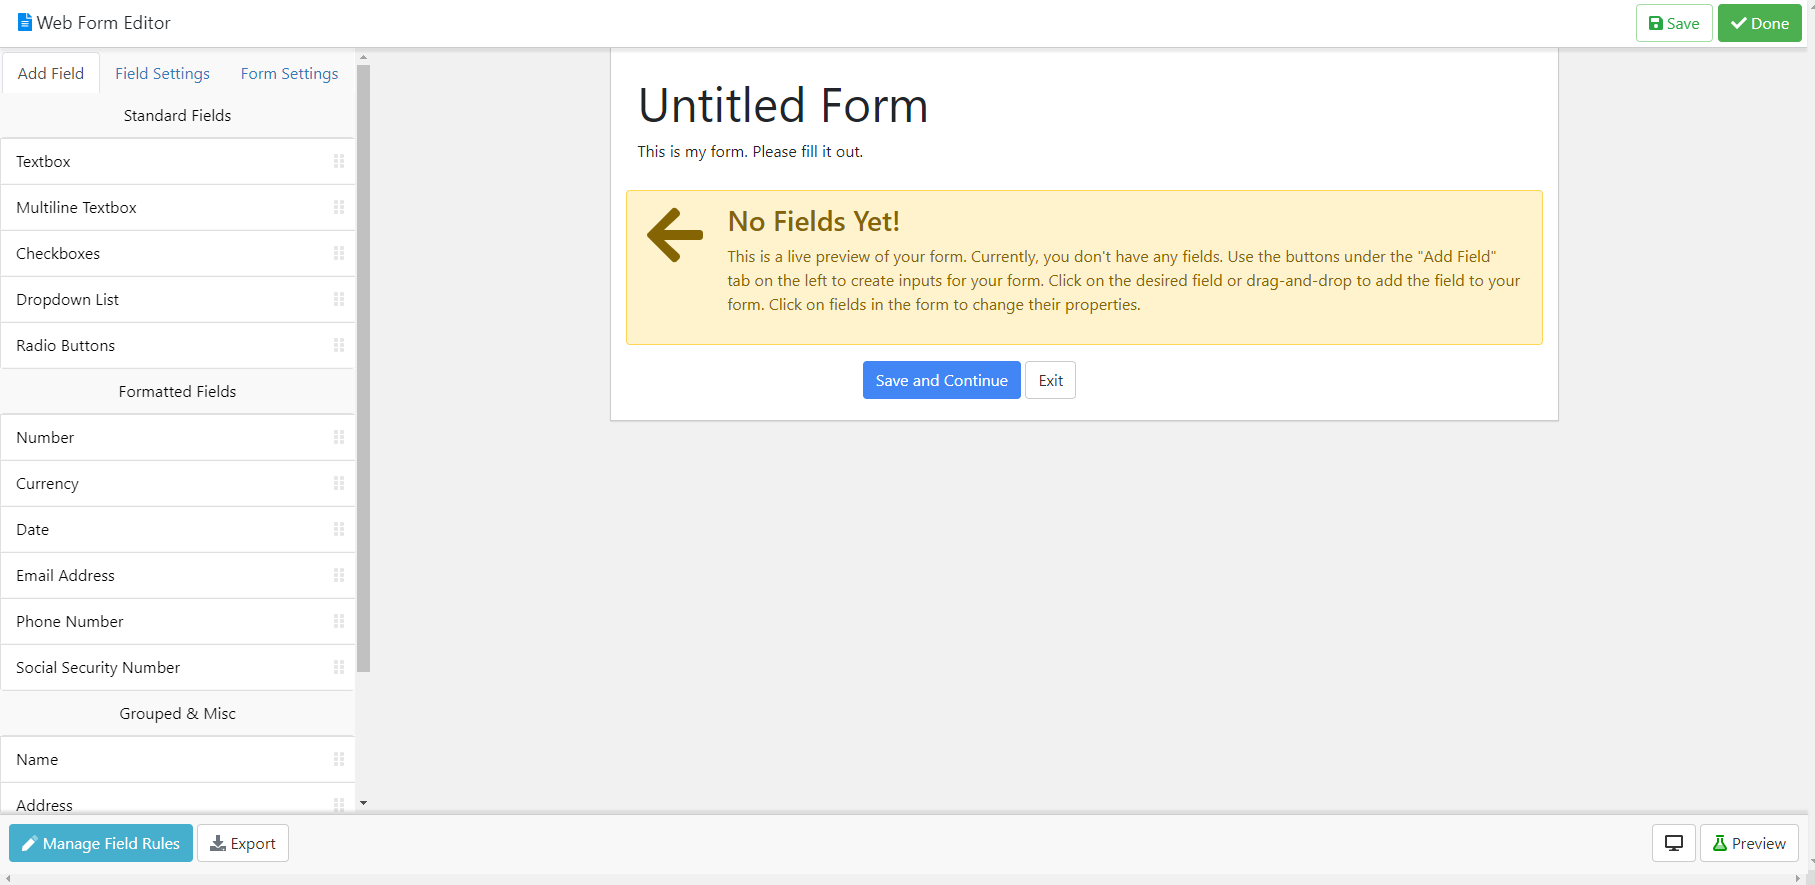
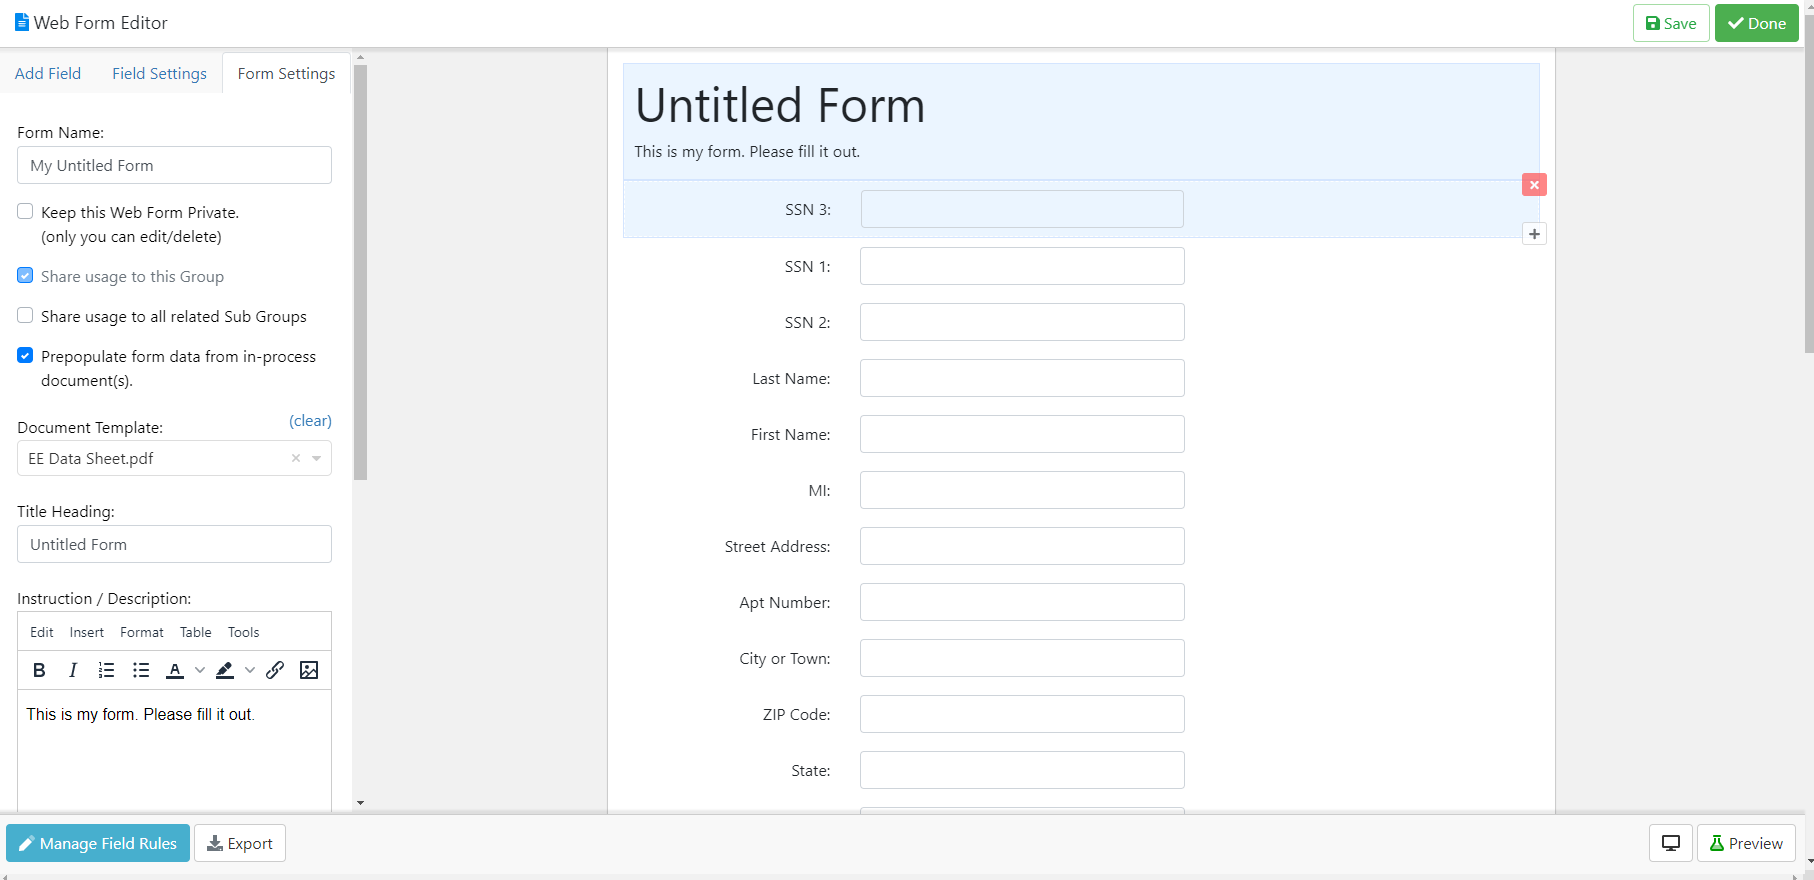
After clicking on the Add Web Form button, the Web Form Editor will appear. This is where you build the Web Form by dragging on fields.
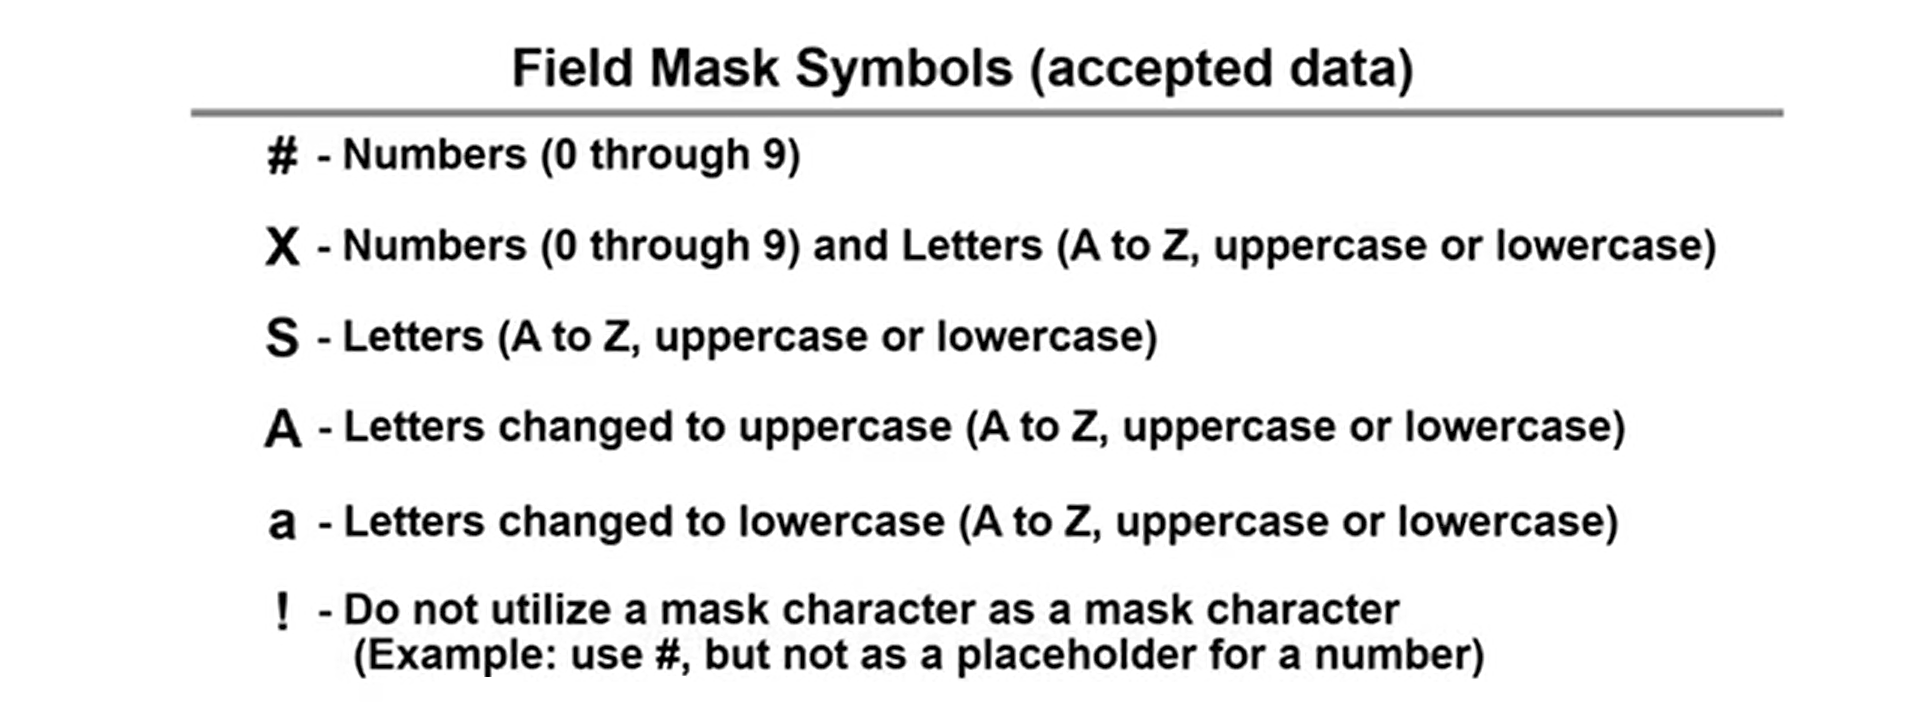
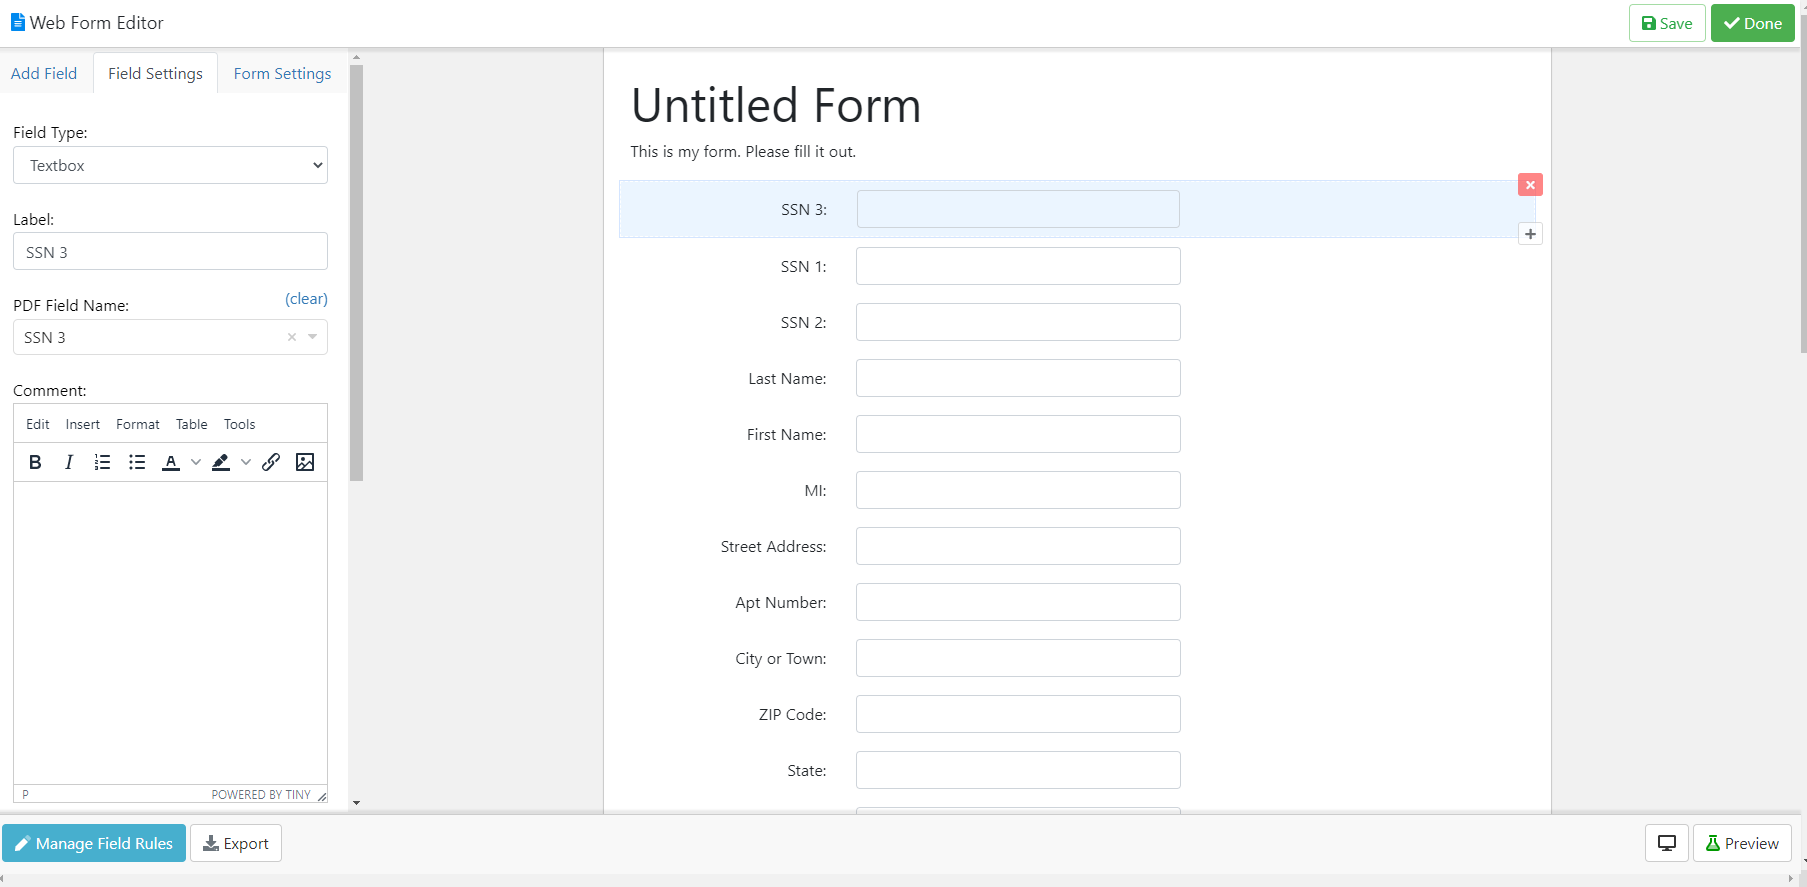
 After you add fields to the Web Form, you will then have the ability to edit field settings by clicking on the field you want to edit. Fields can also use Masks, which allow you to restrict and specify how data is entered and displayed in a form field. You can specify the data pattern and restrict what characters can be entered. To learn more about Web Form Field Masks, please watch the video at the bottom of this article.
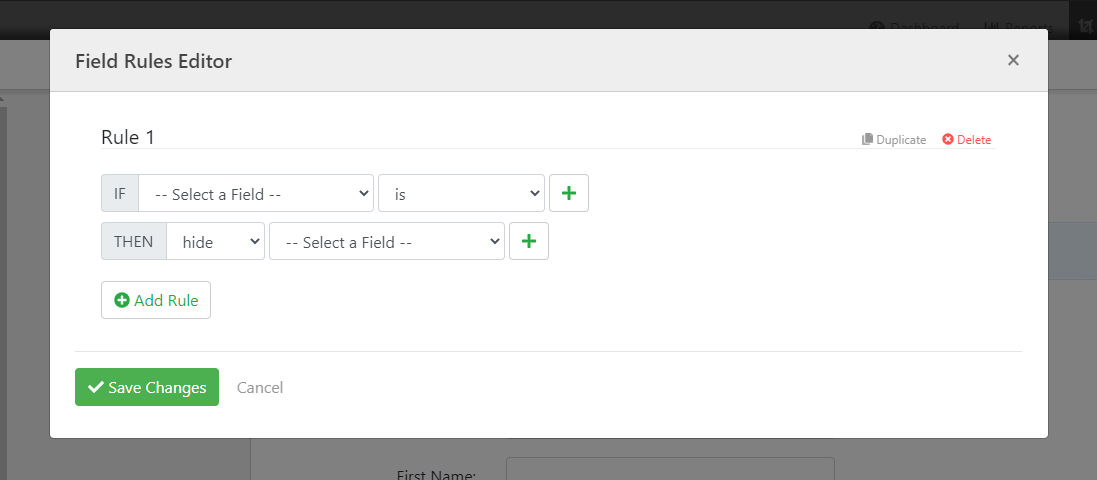
You can also add Field Rules to your Web Form by clicking on the Manage Field Rules button. The Field Rules Editor will appear which will allow you to add rules to fields on your Web Form.
Clicking on Form Settings will allow you to edit settings of the Web Form such as Form Name, privacy settings, Title, Instructions/Description, and more. To preview your Web Form, click on the Preview button. The Display button, next to the Preview button, will allow you to see how your Web Form will look on a Desktop or Mobile screen. To export your Web Form, click on the Export button.
Watch the tutorial below on how to use Field Masks with Web Forms.
To open the video in a new tab click on this link: Web Form Field Masks Video
Was this article helpful?