Okta Integration Setup
- 08 Jun 2022
- 1 Minute to read
- Print
- DarkLight
- PDF
Okta Integration Setup
- Updated on 08 Jun 2022
- 1 Minute to read
- Print
- DarkLight
- PDF
Article summary
Did you find this summary helpful?
Thank you for your feedback!
Log into your Okta account.
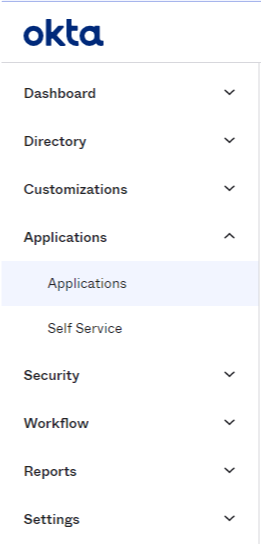
Navigate to Applications > Applications
Click "Create App Integration" if one does not exist for you, make sure the Sign-in method is OIDC-OpenID Connect, and the Application Type is Single-Page Application then click Next.
You can name your integration whatever you want.
Ensure that Grant Type has Implicit (hybrid) is checked
Set the Sign-in redirect URIs to be https://<your-esign-domain-here>/cp/access/okta/.
Set the Sign-out redirect URIs to be https://<your-esign-domain-here>/cp/.
The <your-esign-domain-here> would be current domain in the browser address bar above.
Controlled access can be set to Allow everyone in your organization to access.
Click Save, this should bring you to the overview page for the newly made integration, click on the *Sign On tab*, and under OpenID Connect ID Token make note of the Client ID and Okta Domain values (i.e. https://dev-######.okta.com), we will need them later to add the Okta integration.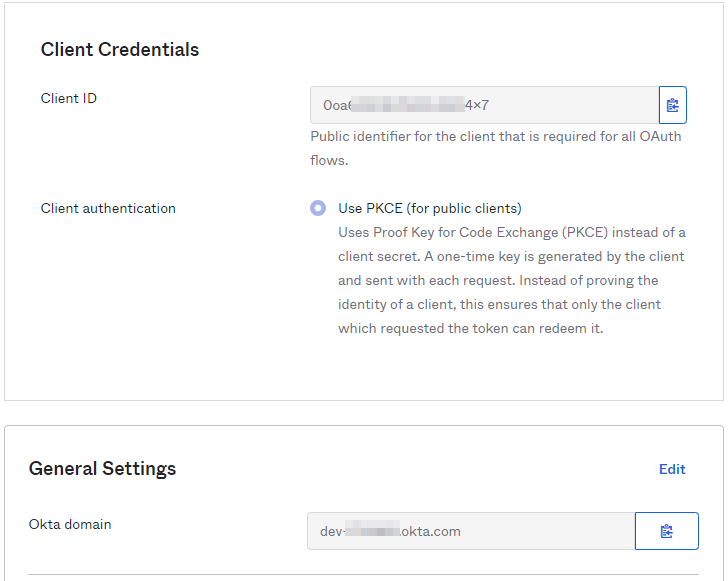
These steps are for on-prem only. Skips these steps if you are a Saas customer.
Add the following lines to Pronto_CP section of your ProntoConfig.ini file:
[PRONTO_CP]
ShowOktaButton=1
Restart services and IIS to ensure these properties are applied.
Login into the CP with either a System-Wide Admin, and Account-Wide Admin, or a Group Admin User account type and then navigate to the "Account > Integrations" section. Click on the green Add Integration button. You will see the following dialog. Type out a unique name for your integration, Select Okta for the Provider, Enter the Okta domain (make sure to prefix the domain with "https://"), and paste in your ClientID.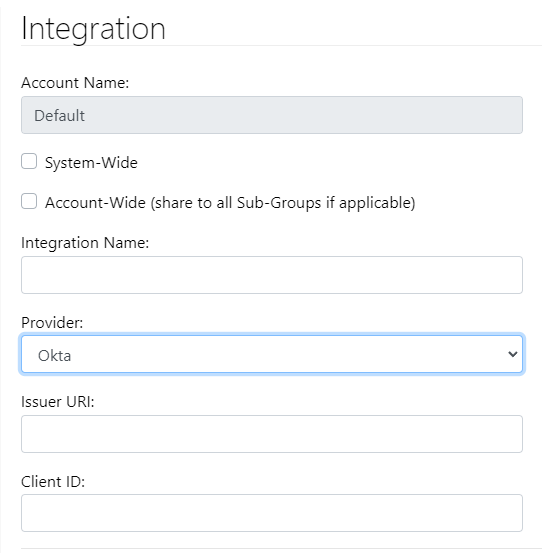
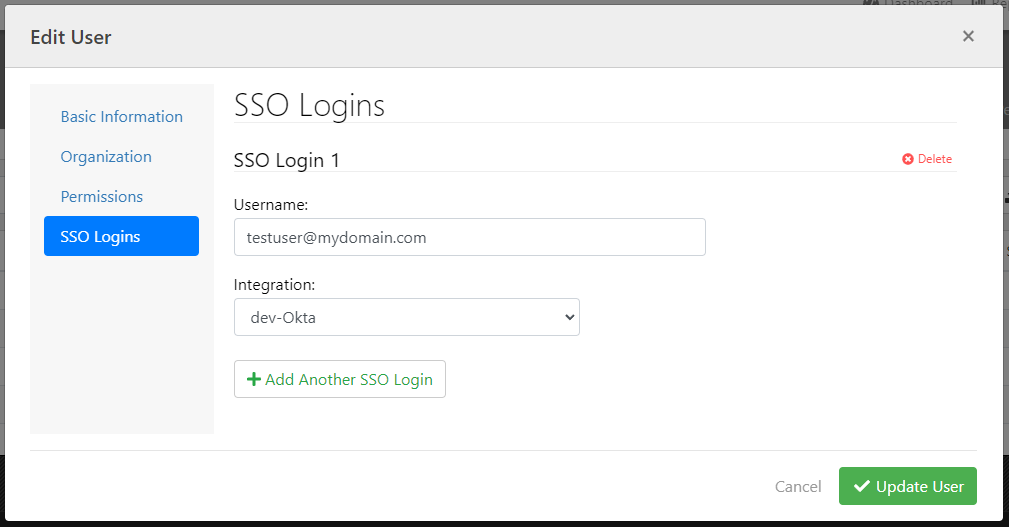
Then you'll need to set up a user. Navigate to the "Account > Users" section, click to edit a user, go to the SSO Logins tab on the left side navigation, click the Add SSO Login button, enter the Okta username, select the Okta integration name you defined in the previous section, and then click Update User to save the changes.
Once you have all the above configurations, when you go to the CP login screen, you'll now see a new button for Okta login: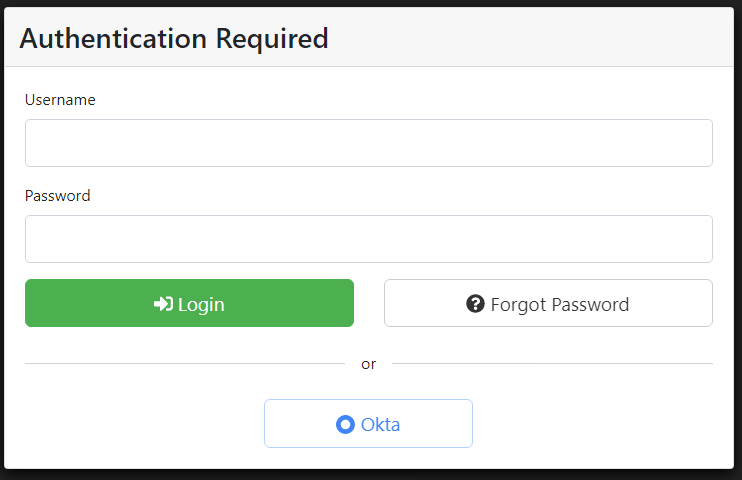
When you click on the Okta login button, you'll be presented with an Okta Username prompt: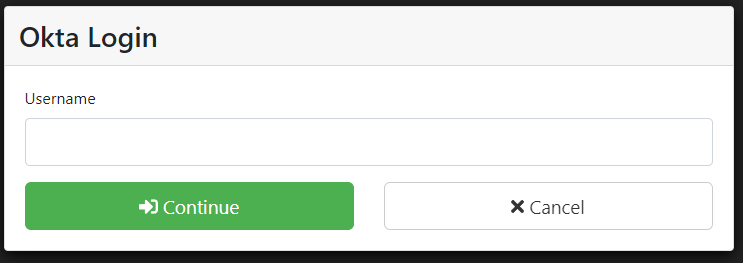
Once you enter in your username and click continue, you'll be prompted to log into your Okta account.
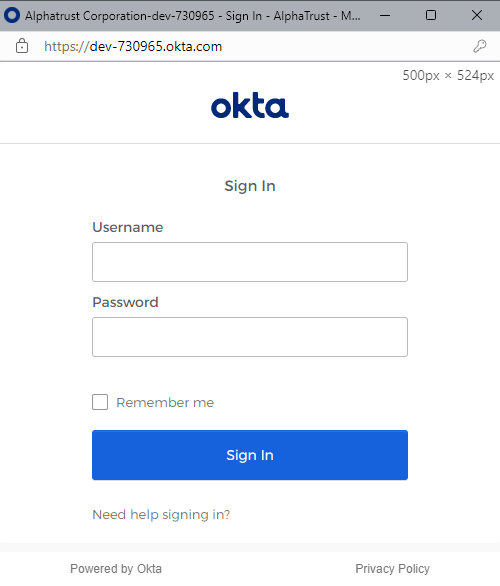
Once you log into Okta, you'll be redirected as an authorized user into the CP.
Was this article helpful?