Content
- 20 Mar 2023
- 1 Minute to read
- Print
- DarkLight
- PDF
Content
- Updated on 20 Mar 2023
- 1 Minute to read
- Print
- DarkLight
- PDF
Article summary
Did you find this summary helpful?
Thank you for your feedback!
Advanced Settings
The following options are for advanced users only. Content, Notifications and Branding will change the look and messaging of your transactions. If you have additional questions, please reach out to the support team for assistance.
Editing the files listed in this section will enable you to change any content in the signing process for your users. By adding additional content sets, you can target specific content to specific signing participants to enable unique experiences during their signing session.
The language that is presented is determined by their browser settings. If the language the user's browser is set to prefer is not available, "English" will be used as the default. You should only create new content files if you want to change the text that's currently in the Master file or if adding an additional language that does not currently exist in the Master set.
The "Master Sets" are available in the following languages:
- German
- English (Default)
- Spanish
- French
- French (Canada)
- Italian
- Dutch
- Polish
- Portuguese
- Portuguese (Brazil)
Note: Custom content, notifications or branding will only be available in the language(s) added. If you would like custom content, email or branding in a specific language, you will need to add the content in that language.
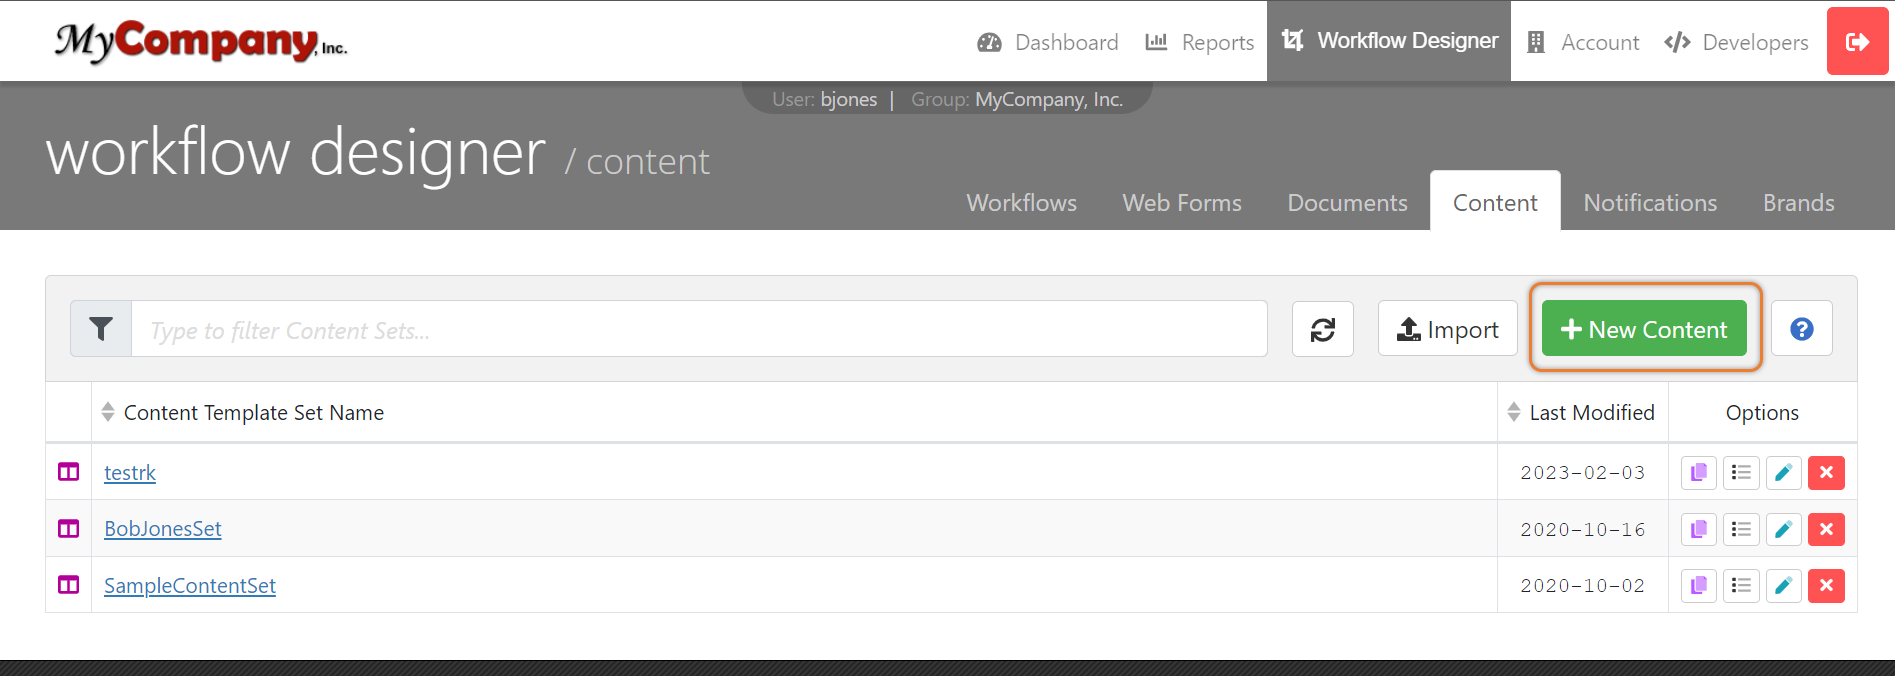
To update a Content Set:
- Click on Workflow Designer in the top right corner of the screen
- Select Content from the drop-down menu
- Click New Content
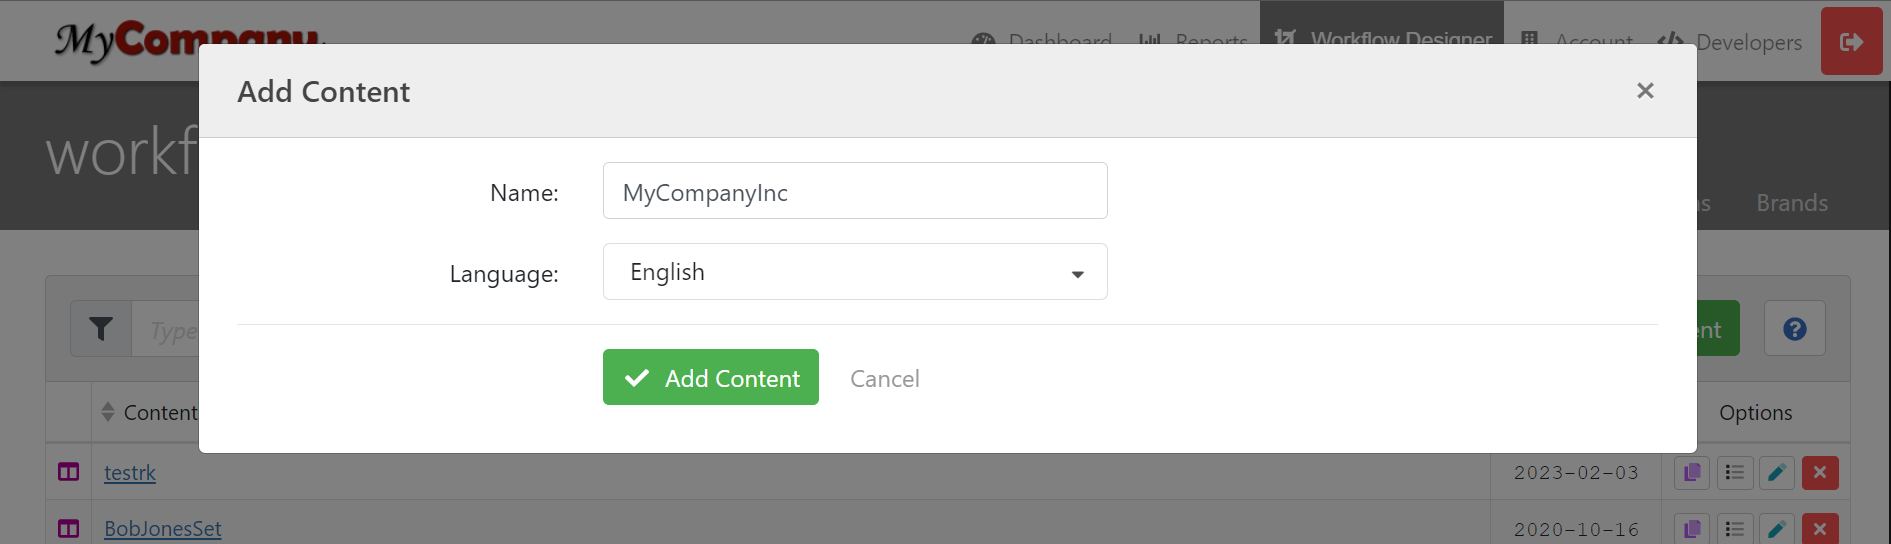
On the new menu:
4. Enter a Template name
5. Select the language
6. When finished, Click Add Content.
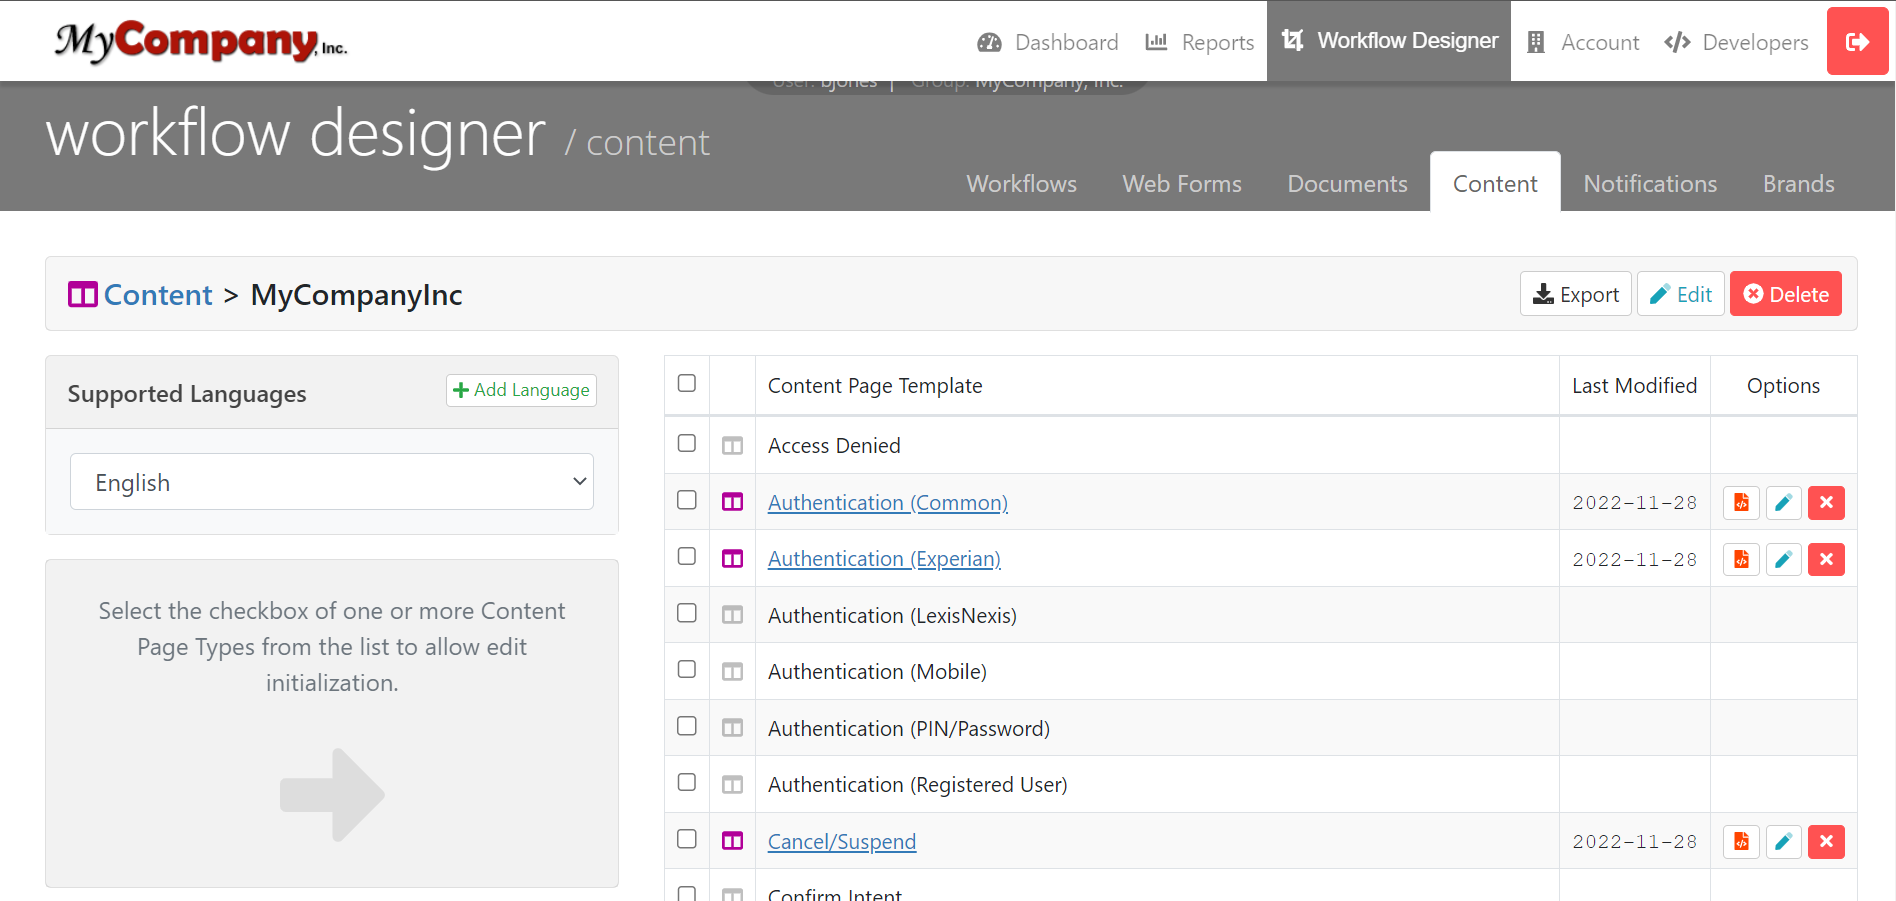
Notice that all the content pages below are now gray.
7. Select the page(s) you wish to update by clicking the check box to the left of your selection.
8. Select the Template set you wish to use (have the default content overwritten by the Template Set selected). Select the Language you want the Template Set to be in. Then click on Overwrite Selected Items.

9. The Templates will appear and become editable.
Watch the tutorial below on how to use a Content Set in a Workflow.
To open the video in a new tab click on this link: Using a Content Set Video
Watch the tutorial below on how to create a Content Set.
To open the video in a new tab click on this link: Create and Edit a Content Set Video
Was this article helpful?